Monday, June 6, 2011


Best Photo- Rose bud
ISO: 400
F-stop: f/14
Shutter Speed: 1/320


Photo 1: Rose bud
Photo 2: Flower
Photo 3: Cork board
Photo 4: Thread
Photo 5: Glass
Photo 6: Plant
Photo 7: Picture frame
Photo 8: Water bucket
Photo 9: Killer turtle
Photo 10: Glass crystal
Photo 11: Clock
Photo 12: Faucet
Photo 13: Eye

I learned how to take macro photographs. At first I had a really tough time adjusting to what settings and being able to even take the picture. But I found out how far away to position the camera from the object so that it wouldn't be blurry or not enough in detail. I also learned what ISO and aperture to use.

Friday, June 3, 2011

Gimp Assignment- Visual Puns


Visual Puns

Photo- Sea Horse


I learned how to take a pun, and edit the visual image of it into a photograph. For this photo I did sea horse, so I used a picture of the sea and a picture of a horse.  I learned how to put the words together and get two different images for the whole word. I also learned how to edit it on gimp so I could put the picture together.

Tuesday, May 31, 2011

Architecture


Best Photo
ISO: 1000
Fstop: f/1.4
Shutter Speed: 1/8000


Photo 1- Dragon
Photo 2- Door
Photo 3- House porch
Photo 4- Sideways building
Photo 5- Ball on house
Photo 6- Chicago
Photo 7- Building
Photo 8- Buildings
Photo 9- Flower buildings
Photo 10- Clock tower

I learned how to take nice architecture photos on the right settings, and how to make the buildings look appealing. I learned how to take a shot of the buildings in a cool perspective and edit them to look appealing.

Friday, May 27, 2011

Gimp- Visual Dictionary


Visual Dictionary-

I learned how to create an image that has other images in it, and create a collage. I also learned how to edit all the settings on gimp to make the photograph look really nice, and have nice touches and edits to it. I learned how to put things together in a collage way.

Monday, May 23, 2011

Photo Assignment 5- Animals

Best Photo-
ISO: 400
f/stop: f/5
Shutter speed: 1/60


Animals


Photo 1-11: My dog

I leaned how to take extremely adorable animal pictures. I used my dog, Max, as my model and most of the pictures I captured were of him chewing his bone. I learned how to time it just right to get a good photo. I also learned what settings I should use for animal photos to really capture their personality and help get a great photograph.

Thursday, May 19, 2011

Gimp Portrait Assignment


Gimp Portrait-
Photo of: Karyssa Witzig.

I learned how to take amazing portrait photographs. I know that to get a great photo, you should have the depth of field very blurry and the person in focus. Also, you should have the background evenly spread out around their shoulders and face. The portrait should be flattering and I chose to make it flattering by cropping it at the waist. I learned how to edit the portraits in Gimp, and make it so the photographs had a white background to frame it.

Monday, May 16, 2011

Food


Best photo- Muffin.
ISO- 400
f- stop- f/4
Shutter speed- 1/60


Photo 1- Salsa and spoon
Photo 2- Salsa and cheese
Photo 3- Salsa, cheese, and tortilla
Photo 4- Muffin
Photo 5- Quesadilla
Photo 6- Pure chocolate ice cream
Photo 7- Chocolate chip ice cream
Photo 8- Ice cream bowl
Photo 9- Pizza and fry


I learned how to take really nice food photographs. I learned that a faster shutter speed would allow more detail and that an ISO in the middle would be just good for food photographs. I learned how to take the shot from the angle that would make food look appealing, or else it would not be a good photograph.

Friday, May 13, 2011

School context


Gimp Assignment- School context

I learned how to take a  photo of something, and edit pictures, objects, and other animations into the picture using gimp. I learned what tools to use, how to get rid of the white background on some of the photos, and also how to put in shadows for the objects that I add in to the photograph. It is very hard to do.

Tuesday, May 10, 2011

Gimp Motion Assignment


Gimp motion assignment- best photo.

I learned how to take motion pictures with a focused subject and a blurry background. I also learned what the best ISO and shutter speed should be set to for an even better photograph. Its important when taking a motion photograph, to pan with the object your moving with. This makes the object in focus and the background blurry.

Monday, May 9, 2011

Nature

Nature
Best Photo-

ISO: 100
F stop: f/9
Shutter Speed: 1/200


Photo 1- Dark yellow flower
Photo 2- Light yellow flower
Photo 3- Dandelions
Photo 4- Garden
Photo 5- Clouds
Photo 6- Tree and sky
Photo 7- Rocks
Photo 8- Log
Photo 9- Stream
Photo 10- Arch of trees
Photo 11- Sunset coming through trees


I learned how to take really pretty landscape and nature photos. I learned how to be able to adjust my ISO, f stop, and shutter speed to take the most flawless photographs of landscape or nature. If you get the f stop just right, you can have the light adjusted for the most perfect photo, and that's what really helped me the most to get these great photos.

Thursday, May 5, 2011

Panaroramic Gimp Assingment

I learned how to take photos for a panoramic shot. I now know that i need to have a 10%-20% overlap on each photo I take for my shot, so that when i stitch it together it will be all even and I can line it up perfectly. I also learned how to use Gimp to edit and stitch my shots together. I know how to change the colors so they all match, and how to stitch the photo together. I also know how to scale it so all the proportions are even.

Tuesday, May 3, 2011

Still Life Photography

Best Photo: Cards
F-Stop: f/5
ISO: 400
Shutter Speed: 1/60


Still Life Photography


Photo 1- Black heels
Photo 2- Light bulb
Photo 3- Snow globe
Photo 4- Jewelry
Photo 5- Ballerina
Photo 6- Cards
Photo 7- CD stack
Photo 8- Dog food
Photo 9- Garden bucket and tools
Photo 10- Lemon and lime
Photo 11- Wooden basket and ball


I learned how to take really neat still life photos. I now know what aperture and ISO would be best for my still photos, and how to capture the image in a really neat way. I also learned how to set up an arrangement of objects, like cards, to make a really cool still life photograph.

Wednesday, April 27, 2011

Edited Car- Gimp Assignment 2

Gimp Assignment two- touchup.

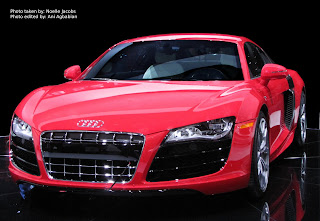
Photo 1- Red car before touchup.
Photo 2- Red car after touchup.


I learned how to use the Gimp editor to touch up my photos. I had no idea before this how you could erase people, make backgrounds different colors, and clone colors, but by using Gimp I learned how to do all of this. I also learned how to use some of the editing tools on Gimp.

Monday, April 25, 2011


Black and White- Best Photo.
fStop: f/10
ISO: 400
Shutter Speed: 1/200


Black And White.

Photo 1- Red rose
Photo 2- Three lights
Photo 3- Clouds, water, and tree
Photo 4- Broken lantern
Photo 5- Lantern on brick
Photo 6- Garden flower branch
Photo 7- Pink flower
Photo 8- Hose
Photo 9- Tree and bird feeder
Photo 10- Stapler
Photo 11- Window sill
Photo 12- Spoons and forks


I learned how to take really cool pictures in black and white. I now know how to adjust the aperture and shutter speed to make the effects on my black and white photo really cool. I also learned how to use Photoshop to make it black and white, and which shades would be most appealing for each photograph.

Wednesday, April 20, 2011

Gimp Pop Art


Gimp Pop Art Assignment

Photo 1- Pop art of me

I learned how to use gimp. I had no idea how to use any of this until now. I also learned how to make colorful pop art with gimp, as well as make it a different looking texture.

Tuesday, April 19, 2011

Why I chose black and white.

http://www.flickr.com/photos/dogwatcher/3598245867/


I chose black and white because I like how it sets in with a photo. I think this photograph of the flamingo really portrays how black and white should be used. It shows how dramatic the photo is, where as if it was in color, it would not be as dramatic. It is not blurry and the composition is set just right, so it makes for a really good black and white photo.

Friday, April 15, 2011

Motion and Aperture


Motion and Aperture

Photo 1- Faucet water
Photo 2- Faucet water
Photo 3- Faucet water
Photo 4- Faucet water
Photo 5- Dog toy
Photo 6- Dog toy
Photo 7- Dog toy
Photo 8- Dog toy


From this assignment I learned how to take aperture shots that either focus on one object and have the background blurry, or that have everything in focus. I also learned how to take motion shots on my camera by changing the shutter speed, that either are still or show movement by being blurry. I learned how to use the AV and TV mode on my camera and which settings to go to.

Friday, April 1, 2011

Composition


  • The rules of composition.

  • Photo 1- Lines: brick railing
  • Photo 2- Depth: berry's
  • Photo 3- Symmetry: stairs
  • Photo 4- Texture: bark
  • Photo 5- Rule of thirds: tree
  • Photo 6- Pattern: bottles
  • Photo 7- Color: door knob
  • Photo 8- Frame: gutter
  • Photo 9- Space: plant
  • Photo 10- Balance: airplane
  • Photo 11- Perspective: wine glass

  • I learned all the rules of composition. Before this class I had no idea what composition even meant or how to use the rules of it, but now I do. I learned the rule of thirds, how to use perspective, and how to create balance in a graceful way.